Friday, December 18, 2015
Almost Amish Granny
Thursday, September 17, 2015
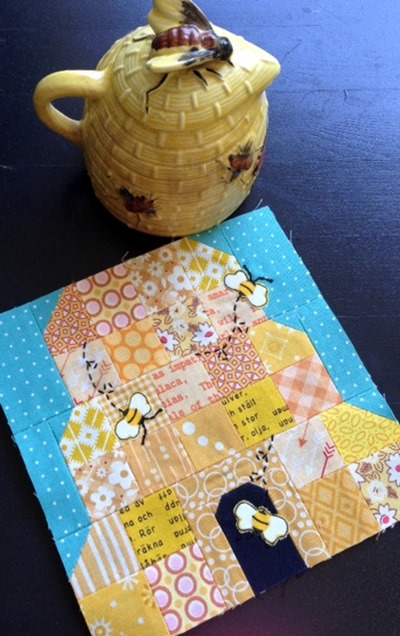
A Honey of a Hive 6.5” Block {a tutorial}
Materials:
- six 1” background squares
- two 1”x2.5” background rectangles
- two 1.5”x2.5” background rectangles
- twenty-six 1.5” yellow squares for hive
- one 1.5”x2” doorway rectangle
- two .75’'x.75’' yellow squares
- two 1”x2” yellow rectangles
- one 1”x2.5” yellow rectangle
- as many applique bees as you want!
***I nearly always press my seams open. It’s up to you how you want to press yours.
Making the door:
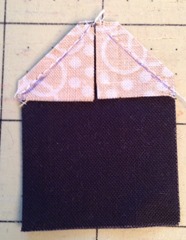
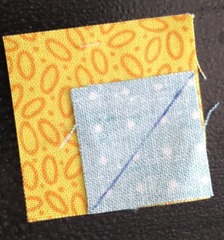
Draw diagonal lines across the back of the .75”x.75” yellow squares. Sew to the upper corners of the 1.5”x2” doorway rectangle and trim.
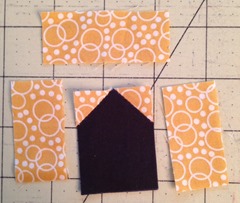
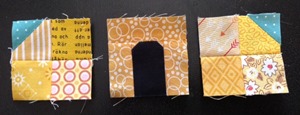
Sew the yellow 1”x2” rectangles onto the sides of the doorway piece.
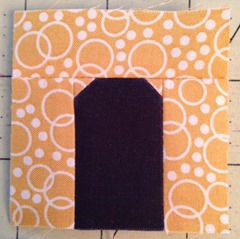
Sew the top 1”x2.5” yellow rectangle to the top of the doorway.
The doorway is done!
Draw diagonal lines on the back of each 1.5” background square.
Sew each background square to six total yellow 1.5” squares. Trim the seam allowance and press.
Okay, now we’re ready to make the bottom tier of the beehive!
Sew together the four squares on each side of the doorway.
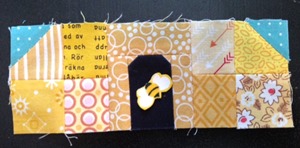
Sew the three pieces together to make the bottom tier.
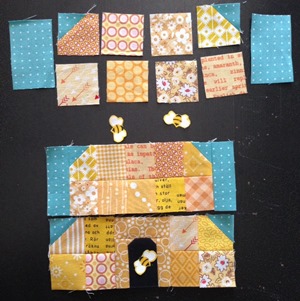
Now onto the middle tier. Sew together the two rows of yellow squares.
Then sew on each 1”x2.5” background rectangle. And the second level is done!
Sew together the top tier of the beehive.
When sewing the sections together, I recommend pinning and using a basting stitch first before using a smaller stitch. If you need to make adjustments to how the angles line up, you can easily pick out the basting stitches and try again. If everything is lined up correctly after basting, just stitch back over the basting stitch with a smaller, permanent stitch.
Now the fun part…applique on some bees! I used Steam a Seam and hand-stitched on some antennae and “buzz trails” with black embroidery floss.
Any questions? Feel free to email me or leave a comment.
Monday, August 3, 2015
Modern Medallion Attempt
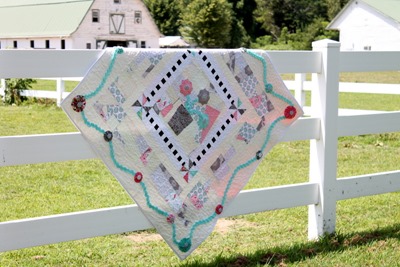
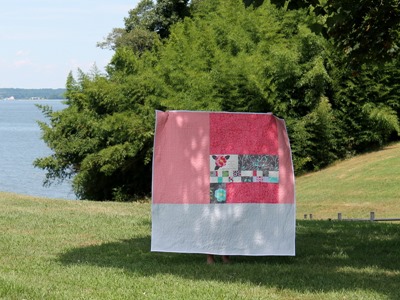
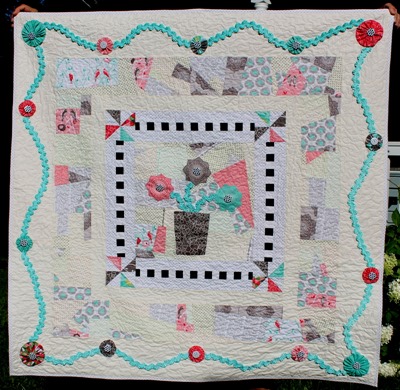
July 31st was the deadline for submitting Riley Blake fabric challenge projects for the Modern Quilt Guild. Due to some extenuating circumstances (many of you know my father died in June) I didn’t get officially started until about three weeks ago. I had just bought a copy of the awesome new book The Modern Medallion Workbook by Janice Zeller Ryan and Beth Vassalo and the idea to make a medallion style quilt appealed to me. My favorite quilt in the book is the June quilt, so I kept the book open to that page just as inspiration for my own creation while working on my design. I also remembered seeing some medallions made by Gwen Marston so I pulled out one of her books to use as inspiration (which is where I got the idea for the black and white striped frame).
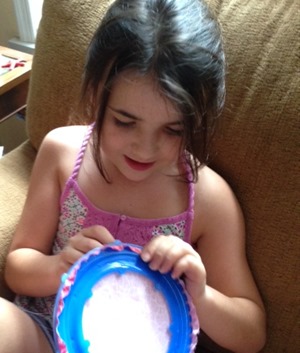
Usually these contests provide fat eighths of a select range in the collection, so I added a layer cake to the fabric to give myself more options, and more large floral motifs to use in the design. Bea (my oldest) made almost all the yo-yos for this quilt. After showing her how to do it, she was on a roll and even taught her friend how to make them too.
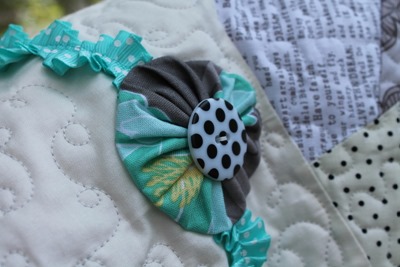
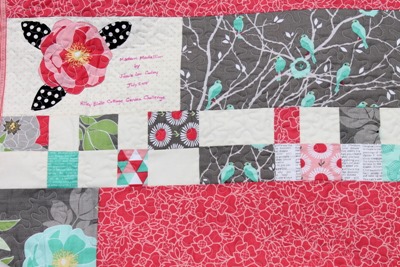
The yo-yos are my favorite part of the quilt. Making a “modern” quilt using yo-yos and rick-rack seemed almost an impossible feat, but I think the medallion is “modernish” for certain. The limited colors, improv nature of the design process and the “made” fabric in two sections, and the feeling of negative space from a distance all add up to a quilt my grandmother inspired, but probably wouldn’t have made herself.
Even the buttons are stark, just black and white (and a few gray and white), but they are playful too. The gathered ribbon ric-rac is one of my favorite Riley Blake products. I’ve used it numerous times on dresses for Veronica but never on a quilt before. It was simple to sew down (I just used my machine, versus hand-tacking all the yo-yos). It comes in red and aqua, and is available at Donna’s Lavender Nest.
The back of the quilt absorbed some of the design elements I wasn’t able to use on the front. Originally I planned to make a “stepping stone” round in the medallion, but it never felt right because it closed in the open space of the entire medallion. So a few of those pavers along with a hibiscus with black and white leaves bring some beauty to the back.
The garden at my home looks pretty messy this season. I haven’t had a lot of time with the baby to spend outside working in it. Luckily the veggies we planted in April right before she was born are doing just fine without too much human intervention. But I wish I could say the space looked more neat and orderly. So for photos we took the quilt to the only place I could think of with a “cottage garden.”
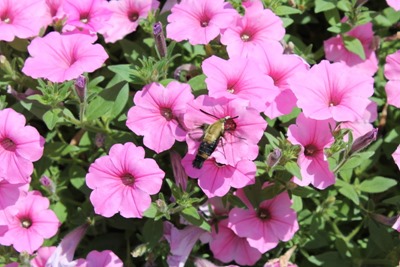
Can you spot the bumblebee moth in the petunias? The entire time we were taking photos, bees, butterflies, hummingbirds, and even dragonflies were buzzing all over the garden. After I finished photographing the quilt, Bea took the camera and captured images of some six-legged friends.
This bumblebee moth kept us company the entire time, buzzing from one petunia to another. It’s such a rare treat to see one. We’ve seen one at our house this summer too (visiting nearly the exact kind of petunia no less!).
This buckeye was one of about twenty flitting about. Its wings have seen better days.
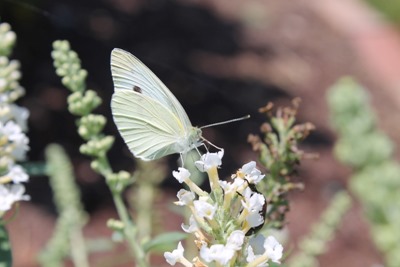
I’ll take my butterflies plain or fancy. I think this is a cabbage white butterfly.
The final quilt measures 50” x 50” and is made with fabrics from Cottage Garden by The Quilted Fish (Amanda Herring), Riley Blake Le Crème basics, and Riley Blake Vintage White solid.
Friday, July 10, 2015
Piggybank Challenge
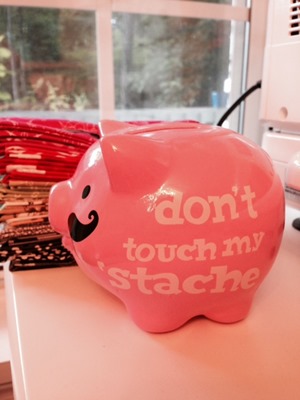
Last summer I read about Val’s piggybank challenge. Living in a house with three kids, each of whom own at least one piggybank, I thought this challenge would be impossible for me. I always give my spare change to them. Would it be morally okay for me, their mom and provider, to keep the spare change for myself? And I didn’t even have my own piggybank! So I just kind of forgot about it until one day I was in line at Michael’s and spied this cute little piggy:
At first the kids were slightly jealous of the new piggybank on the block, and they didn’t like the fact that mom was putting money in it. But soon, they were excited about helping me find orphan quarters in the laundry, payment for my services we’d say. Three cents found on the kitchen counter was more than fair for making dinner. And they would help me periodically dump the change from the “poor box” into it. (Yes, that is what my kids call the cupholders in the minivan thanks to the movie Robin Hood.)
In a few short weeks the little pig was completely full! I needed something else to hold change, so I went on walkabout in my house and borrowed an old dusty jug from my husband’s office. The kids continued to put anything they found—pesos, play money, and even a $2 bill—into the jug. When I got the reminder email to count my money a few days ago, I was pretty excited to see how much it all added up to.
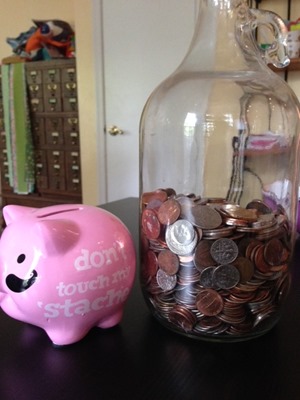
Now, you moms out there know that I couldn’t count this money during daylight hours without the children asking for their share, so I counted the quarters out separately, $81 including golden dollars and the $2 bill.
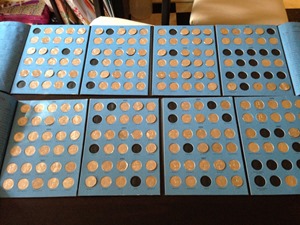
And the kids promptly got out their quarter collecting books and pillaged my stacks of quarters. Now their books are looking much more complete.
We took the rest of the change to the bank and the total was $55.45, so all in all I was able to save $136.45.
Now the fun part, what to buy with all that “spare change?”
Actually I’m going to donate the money to the Orphaned Wildlife Rescue Center near where I live. And I’ll just buy what I was planning (I keep a list, for real!). My favorite new line coming out is Story by Carrie Bloomston and I just saw a custom Aurifil thread box to go with it, cue angels singing from the heavens.
Thanks, Val, for letting me join in the fun, and we are already putting change in for next year!
